Nothing ruins your morning quite like discovering water pooling around your whole house filter. But before you call a plumber, take a breath — this is almost always a DIY fix. Understanding how to install a whole house water filter properly can prevent many of these issues from occurring in the first place.
Most top leaks come down to a worn O-ring or improper seating. The repair takes about 30 minutes, costs next to nothing, and doesn’t require any special skills.
Let’s start with some prevention tips, then walk through the fix step by step.
Most whole house water filter leaks come from a worn O-ring or improper seating between the canister and bracket. Replace the O-ring, apply silicone grease, use plumber's tape on the threads, and avoid over-tightening to eliminate the leak.
Best Way to Avoid Water Filter Leaking
Before telling you the steps to fix the water filter leaking problem, I’ve decided to give you some tips to avoid this problem and increase the lifespan of your filtration system. So read out the ways to maintain your filter system.
Regular Cleaning Routine
Cleaning the inside of your water filter system thoroughly and frequently is important to avoid a build-up of contaminants, minerals, or dirt in the filter. Try not to use any punitive cleaning products and gently stain the system with warm water.
No one wants to add any harmful toxins to their systems that could be absorbed into the water that they and their family drink. Make sure to sanitize the different parts of the system when cleaning your water filter, including the water dispenser, cap, line, and assembly, and clean all elements of the system, preferably on a weekly basis.
New Filter Cartridges
You can maintain your filtration system by regularly changing the filter cartridge, which if left for too long, can become blocked. The control unit will show you when the filter needs changing, usually displayed on your filtration system.
This may be specified by a daily status on the system itself or the changing colors of a discourse.
You should note down the date you last changed the filter cartridge and follow the guidelines provided for that particular cassette type and your individual system regarding how long this should last. The lifespan of a water filter cartridge can be measured in both gallons and months and will have a specific expiration date.
When changing the filter cartridge of your filtration system, don’t forget to assess the condition of the O-rings, keeping there are no drips or leaks originating from this area.
Water Filtration System Replacement
Some filtration systems have specific maintenance requirements like the reverse osmosis filtration systems. With particular types of water filters, it’s essential to pay close attention to the guidelines provided as some cleaning products can damage the system.
Like all other household appliances, your water filtration system has a suggested lifespan after which it will ultimately need replacing. Some problems that you may experience can be easily fixed with a regular maintenance routine, but continuing to use an old water filter can result in filthy drinking water and an inefficient system. Learn more about the dangers of not changing your water filter on time.
A good maintenance routine will improve the lifespan of your filtration system, for a cleaner, better tasting, and healthier drinking water for you and your family. If you take care of these tips, your house water filter will never leak or make you trouble.
Now I’m going to share the steps to fix the leaking top of your house filtration system.
Steps to Fix the Leaking Problem by Yourself
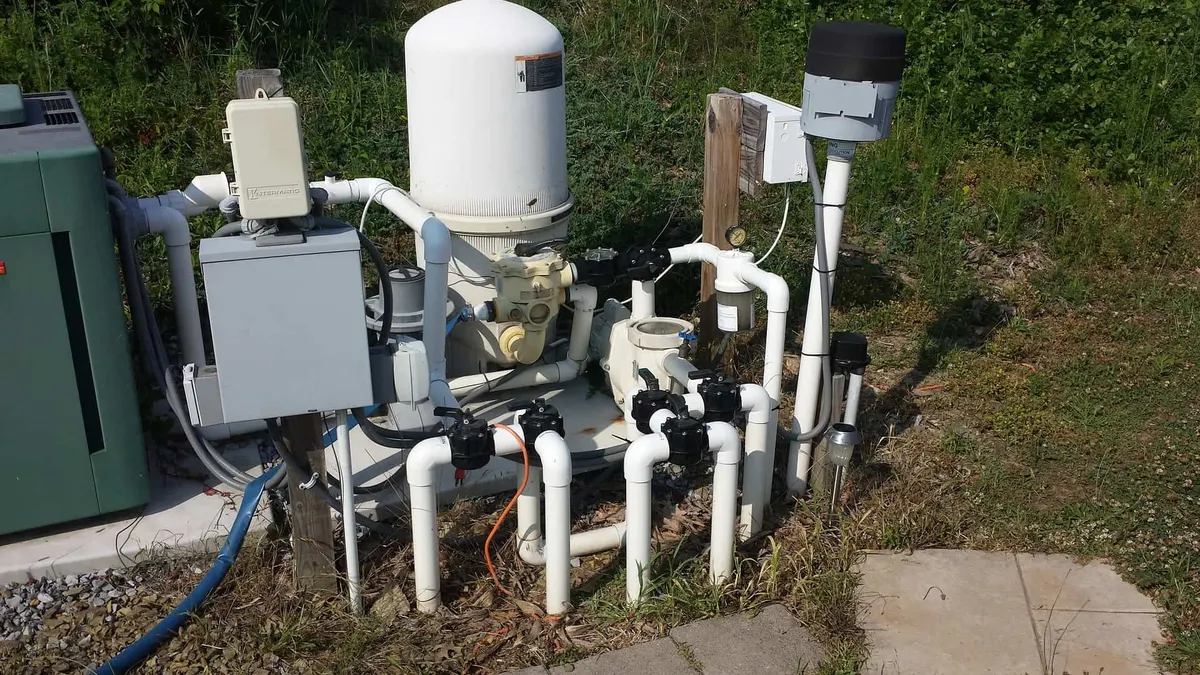
Step 1: Shut Off the Feed Water Line
When your filtration system starts leaking, don’t waste time. Go and shut off the water line to the RO lines by turning the cap on the tank ball valve 90 degrees.
This will help you to save water.
If the water has never been turned off before, this is the best time to practice doing it to verify. This will help you to shut off and re-open your valve.
Look for where your water meter is at the curb and verify you have a water shut off key or wrench. If you can’t turn it off, call your water utility for help, as they may need to switch out valves.
If you’re in an apartment or condo, check with the manager or homeowner’s association to see where your unit’s shut-off valves are located. Ideally, you would shut off the water to your entire house, but for those of you rash enough to proceed, please do so with thoughtfulness.
The last thing you want is a full explosion of water coming in with no method for closing it off. Understand which way the water is flowing, and you need to take a good look at your whole house water filter setup.
A good tip is to fill up a bucket or sink full of water before you turn off your water. This way you’ll have water available for washing up or rinsing.
Step 2: Turn Off All House Appliances
Make sure your appliances of using water are turned off. These appliances are like the ice cube maker, clothes washer, sprinklers, dishwashers, etc.
Suggest people use the bathroom now before you shut off the water.
Step 3: Depressurizing the System
After the water supply is off to your house, go and open up a bathtub or faucet sink valve to let the water pressure release. Ideally, you should do this at the nozzle with the lowest elevation in your house to help drain out most of the pressure in the line.
If you open the 2nd floor or 3rd-floor bathroom faucet and are changing the water filter in your basement you’ll have 2 to 3 floors of water still in the pipeline when you open the filter in your basement hence the bucket.
There are three main valves that you should close in water filtration leaking. The first handle you’ll want to turn off in your water filter.
The second handle you’ll want to turn off when you open the filter housing this will prevent a backflow of water in the line from coming back to you.
The third handle is the bypass handle that should have been off because it was forcing the water to go through your water filter. You’ll now want to open this handle.
Step 4: Opening the Filter Canister
In most cases, people complain that they’re unable to open their filter’s housing as well as complain about the plastic filter wrench. This is either because the system is still pressurized or they overtightened the filter.
Better house filter systems have a red button on top that lets you release the water pressure in the line to make it easier to open the housing. If your system has this red button and the water is shut off, go ahead and press it.
If you hear the sound of pressure releasing, that just saved you from a lot of arm wrestling with the wrench. Some water filter systems even have a built-in bypass.
Use a rubber mallet and gently tap the plastic wrench to help loosen the filter housing. If your home has hard water, use vinegar as it will help to remove hard water build-up. A water softener can also help prevent mineral buildup over time.
If needed, then use a toothbrush and softly apply vinegar to the mineral build-up areas. Due to hard water, it’s possible that the calcium deposits have built up where the thread pattern is.
Carefully proceed and make sure to clean them out.
Once the canister housing starts moving, verify it by using your hands underneath, turning it level. This will prevent having the canister falling to the ground or any stripping of the threads.
You should get a flow of water coming out and then the water leak should go to a dribble as you remove the housing.
Step 5: Check the Old Filter and Clean the Housing
Transfer the filter housing water into the bucket below and look for any big sediment pieces that might show you’re getting dirtied water from a broken water line. The water should smell fine.
If it doesn’t, investigate any serious issues because it might be a problem with your water source.
Remove the disposable filter, these should be replaced every 6 months. The outside of the filter is where the water comes in so all the wreckages should be on this side of the filter.
Take a look inside the center filter ring to see how it looks.
If there are small black flecks, it may be from a charcoal filter. If you see rusty metal flakes, it probably means your steel pipes are starting to worsen. An iron water filter can help address this issue.
A small amount of sand isn’t strange, but a lot of pebbles, sand, or concrete pieces aren’t normal.
Take a look at the bottom of the filter housing for more wreckage. Wash it out and use a clean cloth to wipe down the insides and outsides of the canister.
Wash the threads of the canister as well as the threads of the canister holder bracketed to the wall. You may find chunks of debris stuck in here from opening the canister.
It’s essential to clean this out well, use a toothbrush or Q-Tip, and then wipe it clean with your cloth.
Step 6: Check and Replace the O-Ring
Your filter canister has a black O-ring that’s a food-grade safe ring to help avoid leaks. This O-ring is the seal between the filter bracket and canister and is important for preventing leaks.
Most people think they just need to tighten harder rather than understanding they need a new O-ring.
Clean out the O-ring track with a brush. It might feel gluey due to the silicone grease used on it last time.
Try to get it clean, but don’t use any solvents or detergents to do this.
You’ll want to proceed and put some silicone grease on your fingers and rub a light coating onto the ring. Be sure the replacement O-ring fits nicely into the track.
Carefully remove the O-ring from the canister and take a look for any flattened parts. Don’t stretch the ring because if you need to re-use it, it might not fit again.
Before replacing, check the diameter of the new ring with the old one. The new one should be slightly thicker or the same size in diameter.
Take the time to make sure you’re ordering the right kind of O-ring for replacements. They should be Buna-N O-rings that are also called Nitrile NSF 61 O-Rings.
These rings are certified safe for the water filtration system under ANSI standard 61.
Step 7: Use Plumber’s Tape
Most people skip this step, so you’re free to skip it too, except if you’re running into a leaking problem. Wrap the Plumber’s PTFE Teflon Thread Seal Tape several times around the threads.
You’ll get good coverage without over-doing it.
Make sure your thread this on correctly the first time, otherwise you’ll need to remove it and start all over again. I find that it works best just using my two hands and holding it tightly as I slowly turn the canister round.
Make sure the new filter is in the casing before you do this though.
Step 8: Placing the Replacement Filter
Place the filter into the casing and make sure it’s perfectly centered. If it’s off-center or you lean it while you thread it, you’re probably damaging the top of the filter as it’s pressed into the brackets designed to help guide the canister housing back on.
Take the time to carefully look at your filter in the canister and at the threads you’re screwing it onto. Usually, people tend to hand tighten it only.
It will go on easy and once the water is in it, it will be difficult to unthread unless the system is depressurized.
If the valve is too loose then the filter will leak again. Some plumbers do a little monkey tight, not gorilla tight with the filter wrench, but this step is done because they didn’t install a new O-ring, use PTFE tape, or silicone grease.
If you’re over-tightening the filter, then when you go to do the filter change next time you’ll end up using the strap wrench to get it opened.
Step 9: Slowly Pressurize the Water System
Don’t just go and turn the water system back on to full pressure. If you do so, then expect a leak.
Most people turn on the water only to check the canister fell off and water is scattering everywhere.
Slowly turn on the quarter water and listen to the pipes. It’s better to have some other person who turns on the water while you watch, in this way you can find any problems quickly.
Leaks will either be a huge geyser of spray or appear as a steady stream of drops down the side at the connection.
This is a good time to check for rust and wreckage getting flushed out in the lines before proceeding. You should let the water run until it goes clean.
Once the water is running clear, you should go up to the highest water vent in your house, usually an upstairs shower, and turn it on to eliminate any air out of the water lines.
If there’s still any sign of leakage, shut everything down. If it looks fine, go ahead and go to half water pressure and then full water pressure.
Step 10: Clean Up and Final Tips
Carefully clean up everything. Clean the bucket by dumping out the water on it.
I recommend that you leave the bucket under the water filter for the next filter change or in case any leaks develop.
It’s better to put a note on when the filter was changed and set a calendar reminder on your phone for 6 months out. I recommend installing a water leak detector.
It will help you in saving your dollars. If you don’t have it, this is a good time to get one.
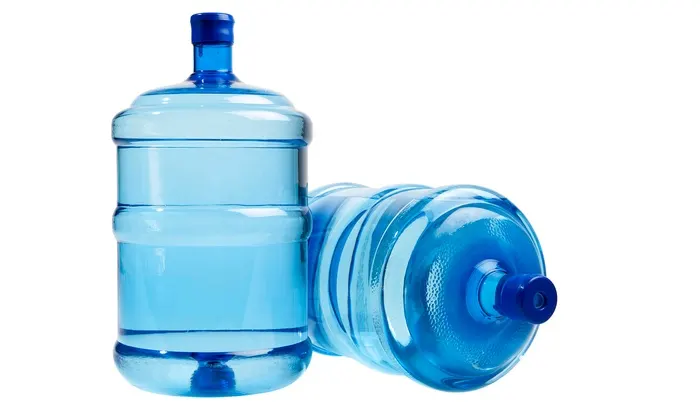
Benefits of Using Water Filtration
Water filtration can provide better smelling and better-tasting drinking water by clearing chlorine, heavy metals, pesticides, chemicals, and bacterial contaminants.
It will remove the lead from the beverage immediately before drinking so this will prevent you from harmful substances from entering your body. The purchase of a countertop filter leads to a source of unpolluted, healthy water that costs much better than boiling water.
Water filters greatly reduce the danger of carcinoma, bladder cancer, and rectal cancer by removing chlorine and chlorine by-products from beverages.
It will give you good health-related benefits and protect your body from dangerous diseases and increase your lifespan. A filter provides pure and healthy water for cooking also as drinking at the convenience of water.
Water filters reduce the danger of stomach disease by quite 33 percent by removing cryptosporidium and giardia from filtered water.
Drinking pure water is especially important for children. Water filters provide the pure and healthiest water for children’s developing immune systems. A point of use water filter can be a simple way to make sure clean drinking water at individual taps.
A good carbon filter will remove a spread of VOCs (volatile organic chemicals) like carbon tetrachloride, atrazine, tetrachloroethylene, and benzene that end up in drinking water.
Lastly, aesthetics and taste are an enormous advantage to the filtered beverage especially when activated charcoal is employed. Your water will be clearer and taste better and you’ll want to drink it more.
Frequently Asked Questions
Almost always, it's the O-ring. It gets worn, damaged, or just doesn't seat properly between the canister and mounting bracket. Other possibilities include cross-threaded housings, calcium crust on the threads, or a cracked canister. But a new O-ring with silicone grease solves it most of the time.
Yes, and I'd recommend it if you've had recurring leaks. Wrapping PTFE tape around the canister threads adds an extra seal that can make all the difference. Just make sure you wrap it the right direction or it'll bunch up instead of sealing.
Every 6 to 12 months for most households, though your water quality and daily usage can push that either direction. Pro tip: every time you swap the filter, check the O-ring and give the canister housing a good cleaning. That's how you prevent leaks before they start.
It's the safest move, yes. If your filter has a built-in bypass valve though, you can use that to isolate just the filter while keeping water flowing to the rest of the house. That makes the whole process a lot less disruptive.
Final Thoughts
A leaking water filter looks alarming, but it's usually one of the easiest plumbing fixes you'll ever do. In most cases, a new O-ring, some silicone grease, and maybe a wrap of plumber's tape is all it takes.
The bigger lesson here is that regular maintenance prevents most leaks from happening in the first place. Check the O-ring every time you swap a filter, keep the threads clean, and don't over-tighten the canister. Do that, and you'll rarely deal with leaks again.