No budget for a water filter? No problem. You can build a surprisingly effective DIY charcoal water filter with materials you probably already have. If you’d rather buy something ready-made, check out our guide on what filtered water is and why it matters.
Here’s a fact worth knowing: humans can survive about a month without food, but only 3 to 7 days without water. Clean water is non-negotiable.
If you’re ever in a survival situation — whether it’s a camping trip gone long or an emergency at home — and the only water available looks sketchy, you need to filter it before drinking. Dirty or cloudy water should always be filtered first, then boiled.
For anyone who camps, hikes, or just wants to be prepared, learning to build a water filter is a genuinely valuable skill. Check out our guides on filtering water in the wild and building a homemade water filter for more options.
The key is combining filtration (removing particles) with purification (killing bacteria). This DIY charcoal filter handles the first part. Let’s build one.
Step 1: Prepare or Collect the Materials
Before creating your charcoal water filter, there are a few things you need to prepare. They’re readily available and can be found at home or your nearest home depot, and if not, it’s always easy to find a substitute for all these items from your surroundings.
1L Plastic Bottle or Taller
You may use your old plastic bottles of soda or water at home. If you’ve taller bottles than the 1L, the better.
Please take note that taller bottles are better when making a charcoal water filter as it gives the water a long way to get filtered compared to the broader bottles. In the wilderness, you can use the bark of a tree or anything you can form into a funnel shape.
Cotton Ball, Coffee Filter, or Cloth
Either of these should be available from your home. This will be the last substance or part where the water passes through before dripping out of the bottle.
If unfortunately both aren’t found at home, you may consider using a piece of cloth as the substitute, but take note that you’ll still need another piece of it later on. While in the wilderness, you may use grass to replace this and make sure to put it tightly inside the bottle right after its cap.
Piece of Cloth
Cut a piece of cloth with a size that’s almost the same as the diameter of the bottle. Make sure to have a size that’s enough to serve as the separator of charcoal and sand.
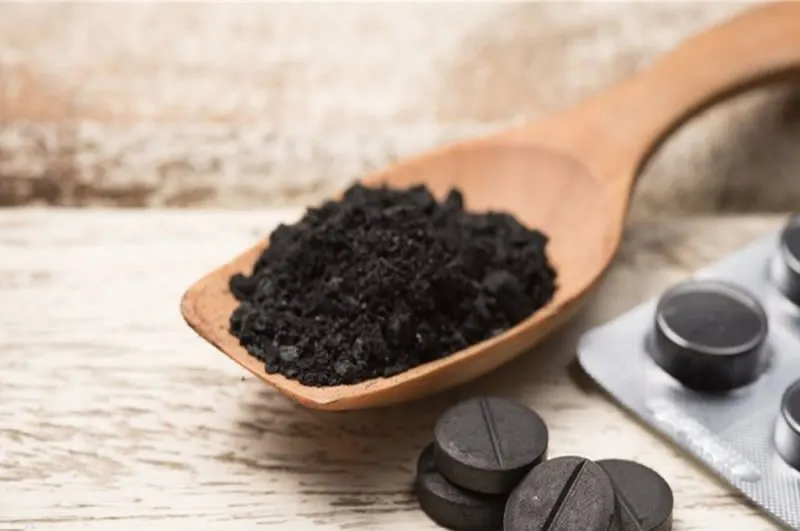
Charcoal (Ordinary or Activated)
Charcoal is considered the most important substance needed for this water filter, as it’s capable of absorbing all the contaminants and impurities found in the water. You can also buy bulk activated charcoal for larger projects. Some prefer to have activated charcoal, but that will cost you more. Learn about how to clean a carbon water filter to extend the life of your charcoal.
If you don’t want to spend too much, you may still use charcoal from burning wood.
Believe it or not, aside from being used in grilling, charcoal has many benefits for water filtration. It makes the water healthier and tastes better. Check out charcoal filter water bottles for a portable option.
If you can’t buy charcoal from a store, then you might need to create your own. Even if you’re outside your house for camping or in the wilderness, you can make your own charcoal.
Yes, you can create your own charcoal, but it will also be a great help considering the type of wood to be used. You also need to choose the kind of wood that you’ll be using.
It’s better to use softwood, as it does a better job of absorbing dirt and impurities. On the other hand, hardwood is recommended to be used if you’re going to make pencils since they’re hard to break.
Knowing this makes you even more excited to see how charcoal helps in filtering the water. But after burning wood for the charcoal to be used in your water filter, you can’t use it immediately, and you still need to wait for it to cool down so it will be better to get back to it after a day or two.
Once your charcoal is ready, you’ll need to crush it using a rock and turn it into gravel-sized pieces.
Sand
It doesn’t matter whatever the color is, as long as you make sure it’s cleaned first before you use it. Sand plays a key role in sediment water filters as well. You may buy this from a store, or if you’re lucky to live along a body of water, you may get it from there for free.
Pebbles
These are small stones that you may find anywhere. You may buy them from your favorite fish store as they sell them for aquariums, or the stores selling plants have them too.
You may also just get them directly from the ground. Just make sure you choose the good and clean ones.
Collection Container
Any container that could catch the filtered water and that you may use for boiling later on. This isn’t part of making the water filter itself.
However, by having this, you’ll know whether your do-it-yourself charcoal water filter was a success or not.
If this isn’t available, you may still use another plastic bottle to store your filtered and clean water. The size of this should be enough to hold your filtered water so that there will be no wasted water after the filtration process.
Scissors or Knife
Extra care is needed when using this. This will be used to cut the bottom of your plastic bottle for your charcoal water filter. If you prefer a ready-made option, see our guide on coconut water filters which use similar carbon-based materials.
You’ll also need help or assistance from an adult to use this before cutting the bottom of the bottle.
Step 2: Cut the Bottom of the Bottle
Please be careful in doing this since you need to use a knife, cutter, or anything sharp. You only need to cut the bottom part of the bottle.
That’s where you’ll put in all the materials. The water will be poured into this open end, and the filtered water will drip out through the cap end at the bottom.
If you’re hesitant to do this yourself, ask assistance from an adult or someone skilled enough to cut it carefully.
Step 3: Poke a Hole on the Bottle Cap
Using the same tool you used to cut the bottom of your bottle, make a small hole in the cap. This is where the water will drip out from the bottle and serves like your faucet.
Make sure the hole isn’t too large. You want the water to drip slowly, not flow freely.
We’re reminding you again that you need to be extra careful in doing this since you’ll be using a knife, scissors, or a cutter.
It’s better to ask assistance from someone skilled to poke the hole carefully since the cap is tiny and hard to hold steady.
Step 4: Put in the Cotton Ball or Coffee Filter
Position your bottle upside down with the cap on. Place the cotton ball, coffee filter, or piece of cloth inside the bottle right next to the cap.
You need to make sure it’s placed very tight since that will be the last one to filter the water. If it’s not put in very tightly, there might be some small particles of dirt that could escape from the filtering process.
Or you may cut a piece of cloth from your shirt that’s enough to cover the passage of the bottle before its cap. For this layer, it’s better to use a white or light-colored piece of cloth.
Since this is the last layer of your filter before the water drips from the bottle, the result or color of the water might get affected if you choose a colored piece of cloth. When you’re outside in a survival situation in the wilderness, you may use grass to replace this, and you still need to make sure it’s cleaned first.
You don’t want to have soil in your final product after being filtered by the charcoal.
Step 5: Put in the Charcoal
Whether you use activated charcoal or ordinary charcoal from burned wood, this goes into the bottle after the cotton ball. Activated charcoal works similarly to a carbon block water filter.
Pour charcoal into the bottle to about a two-inch height. Press the charcoal down firmly, as the tighter it’s packed, the better it absorbs contaminants.
If there are gaps in the charcoal layer, some impurities could skip through the filtration process.
Step 6: Put in a Piece of Cloth
Place a piece of cloth right after the charcoal layer. Any cloth works, even a piece cut from a shirt if you’re camping.
This step can be skipped, but since we want to make sure the water is filtered well, you should use another piece of cloth right after the charcoal layer. This makes sure your sand won’t mix with the charcoal once the water passes through the filter.
Aside from acting as the separator of those two layers, you can also consider this piece of cloth as another filtering layer since it also catches particles.
Step 7: Put in the Sand
It doesn’t matter whether you use white or grey sand, as long as it’s clean. No one wants to use sand that contains weeds or insects.
Put sand into the bottle to a height of about three inches. Sand should have the largest portion of your filter, as its fine particles filter the suspended impurities in the water.
Pack the sand tightly so it can function properly. Same with the other materials inside your bottle, sand should be placed very tight so it can filter effectively.
Smaller visible particles will get stuck in this layer before they reach the charcoal below, and the cloth in between helps keep the layers separated.
Step 8: Put in the Pebbles
Same with the sand, these pebbles or small stones need to be cleaned first before using them. They go inside the bottle after the sand layer and filter the bigger chunks through physical means alone.
You may just put pebbles with a height of about one inch. That’s already enough to block those particles you see from the water with your bare eyes.
Pebbles or small stones are very easy to find. You can even find a stone from the ground you’re stepping on.
You may also buy them from a fish store or from those selling plants. A similar layered approach is used in multi-stage water filters.
Step 9: Pour the Untreated Water
This will be the most exciting part when making your charcoal water filter, as you’ll find out in this step if you’ve created a perfect one. Place your bottle on top of your pot that will catch the water.
A pot is recommended so you’re also ready to boil it right after filtering. But if in any case that’s not available, you may still use another container that can carry the clean water.
You should take note that the water should drip from the bottle and not flow freely. If it flows fast, then you need to repack the materials more tightly inside the bottle.
All materials inside should be placed very tight so the filter can work properly.
If the water dripping out is clearer than what you poured in, then you’ve created a successful charcoal water filter. This is the same principle used by gravity water filters. You may repeat the process two or three times to make sure all impurities have been filtered and removed.
Step 10: Boil
This is the last thing you need to do after filtering your water. Yes, it’s not technically a step in making the water filter itself.
However, it’s essential to know if you want to make sure you’re drinking safe water.
Remember that charcoal can only absorb the impurities of the water, but it doesn’t kill the pathogens or the microscopic elements found in the water. For a more thorough solution, consider a survival water filter. You can get rid of these by boiling the water.
If there’s no way for you to boil the water, you can still sterilize it with the help of sunlight. Exposure of the water to sunlight depends on the weather conditions.
You need to shake the container first to add more oxygen to the water.
If you’ve iodine tablets, you may simply put them in your filtered water. One of the benefits of iodine is that it purifies water. For a more permanent setup, consider a point of use water filter or an inline charcoal water filter.
Frequently Asked Questions
It'll handle sediment, some chemicals, and larger contaminants, but don't count on it for bacteria and viruses. Always boil the filtered water for at least one minute or use purification tablets afterward. The filter cleans the water visually; boiling makes it safe.
When the water coming through stays cloudy even after running it multiple times, the materials are spent. With regular use, plan on refreshing the charcoal, sand, and pebbles every 2 to 4 weeks. The charcoal in particular loses its absorption ability over time.
Activated charcoal has been heat-treated to create millions of tiny pores, which massively increases its surface area and absorption power. Regular campfire charcoal still works — just not as well. Either will do in a pinch for a DIY filter.
It's actually perfect for camping. You can substitute materials with whatever nature provides — grass instead of cotton balls, charcoal from your campfire. Just don't skip the boiling step before you drink it.
Final Thoughts
And that's it — 10 straightforward steps to build your own charcoal water filter. It's a genuinely useful skill to have, whether you're prepping for a camping trip or just want to know how filtration actually works.
If you're heading outdoors and worried about running low on clean water, having this knowledge in your back pocket could be a lifesaver. The materials are cheap and easy to find.
As for how long it lasts: when the water coming through stays murky no matter how many times you run it, it's time to swap out the charcoal, sand, and pebbles. Start collecting your materials now and give it a try — you'll be surprised how well it works.