If you use refrigerator water filters or any other type of filter long enough, eventually one will get stuck. It just happens.
Rust, mineral deposits, and plain old sediment buildup are usually the culprits. This is actually one of the dangers of not changing your refrigerator water filter on schedule — the longer it sits, the harder it is to remove. Regular maintenance helps, and learning how to clean a carbon water filter is a good place to start.
Below, we’ve laid out removal and installation instructions for every common filter type so you can get unstuck without calling a repair person.
Definitive Guide on How to Get Your Water Filter Unstuck
In this 10-step guide, we’ll troubleshoot how to get your water filter unstuck. If you’ve any difficulties removing your water filter, consult your owner’s manual first.
The method for removing a stuck water filter depends entirely on the type of filter you've. Below you'll find instructions for quarter turn filters, push button filters, compartment door filters, RO systems, GAC filters, and more. Always turn off the water supply before attempting removal.
1. Quarter Turn Filter
Water filters are situated around the bottom-front part of the refrigerators, generally in the base grill area located inside the refrigerator. If you have a GE model, see our guide on changing the water filter on a GE refrigerator. When they’re stuck it could be due to a wrong turn or the button simply not being pushed in.
Installation and removing your water filter on these base grill-mounted systems are quite easy.
If the Water Filter Is Stuck
If your water filter is stuck and you’ve a bottom grill, follow the instructions below. Most of the steps require you to remove the bottom grill of your refrigerator in the grille area.
Turn the Filter Counterclockwise
For removing the water filter located inside the refrigerator, turn the filter counterclockwise a quarter to the left. The caps are usually aligned vertically.
Pull the Filter Out
Take out the water filter directly by pulling it straight out of the housing.
Remove the Caps
If available, remove the caps depending on your model. Remember that the new filter should have a filter cap included.
Protect the Filter
Covering the water filter with a cloth is advised to protect it from getting contaminated or damaged during the removal process.
Use Needle Nose Pliers
Rotate the water filter cap a quarter turn using standard needle nose pliers. If you don't have needle nose pliers, you can try using a standard pair.
Remove the Bottom Grill
Switch the refrigerator off and remove the bottom grill in the grille area. We highly recommend following the installation instructions manual for this. Removing the grill gives you easier access to the water filter cap. Don't apply heavy pressure or force on the water filter as it may cause damage.
Check for Damage
Check the water filter for any damage or contamination. Replace the necessary parts in the grille area and reinstall the water filter.
2. Push Button Filter
Please follow the instructions below for push button filters that are stuck.
If the Water Filter Is Stuck
Find the Button
Find the button on the base grille of the push-button filter.
Push the Button
Remove the water filter from the filter assembly by pushing the button on the base grille.
Detach the Base Grille
When the base grille is detached, you can easily remove the water filter for cleaning or replacement.
Press and Hold
Press and hold the button to release the water filter from the assembly.
Press the Filter and Button
To fully detach the water filter from the filter assembly, press on the filter while simultaneously pressing the button.
Unplug and Remove Bottom Grill
Unplug the refrigerator and remove the bottom grill following the installation instructions in your manual. This gives you easier access to the stuck filter.
Test the Filter Movement
Firmly press the button and check if the filter has moved. If the water filter has moved, push the filter back in and then push the button again. This will help make future removals easier. Don't forget to remove the water filter cap on the end of the filter.
Check for Contamination
Check for any contamination clogged in the filter or any visible damage. Check for leakage by flushing water through the water filter.
Reconnect Tightly
Connect the filter back to the filter assembly tightly to prevent leakage. Make sure the filter has been sanitized before installing it back.
Replace Parts and Test
Change the necessary parts and install the system again. Now check the water flow to make sure everything is working properly.
3. Water Filter Compartment Door Opens Up and Pops Out
If the Water Filter Is Stuck
Open the Compartment Door
First, open the water filter compartment door. The door usually opens in an upward direction.
Remove the Filter
When the compartment door is open, take the water filter out completely.
Check Door Functionality
Check that the water filter compartment door is functioning properly and opens and closes smoothly.
Turn Off the Water
Turn off the water to the refrigerator and clear out some of the water from the waterline using the water dispenser.
Release Water Pressure
Dispense several glasses of water. This method releases some of the water pressure that may be building up in the waterline.
Try Removing the Filter Again
After clearing out the water, try removing the filter. At this stage, you can check the water filter for things that may be clogging it.
Replace or Repair
Once checked, you can either replace the filter or fix the parts causing the clog. Don't forget to close the water filter compartment door when finished.
4. Push Button or Pull Tab
For push button or pull tab stuck water filters, follow the instructions below.
If the Water Filter Is Stuck
Open the Water Filter
Open the water filter housing or compartment.
Turn Counterclockwise
For removing the water filter, turn the filter counterclockwise to the left.
Open the Compartment Fully
Check that the water filter compartment door is open completely. While the door is open, remove the filter and check for faulty parts.
Check for Dirt and Rust
Check for dirt in the mainline hose. The parts that are in contact with the filter may be rusty as well. An iron water filter can help if rust is a recurring problem.
Replace Faulty Parts
Remove the faulty parts and replace them with new parts that have a longer lifespan and won't clog. Don't forget to close the compartment door.
5. Reverse Osmosis Water Filters & Membrane
Below are the generalized filter and membrane unclogging orders for most standard reverse osmosis systems. Proper sanitization and service procedures must be used while changing any filters or membranes of your drinking water systems.
These step-by-step guides will help you make sure those sanitation and service procedures are met. You can also learn how to sanitize your RO system including the tubing, storage tank, and fittings.
If You Have a Stuck Water Filter
Handle with Care
Be careful while handling filter cartridges. You can find the correct filters for your RO system by selecting your brand and model in proper order.
Keep Filters Sealed
It's desired that the water filter cartridges remain in their original packaging until they're ready to be installed if the filters are clogged due to longevity loss.
Sanitize Your Hands
It's important for the person executing the replacement or unclogging service to sanitize their hands before executing the service. This prevents the introduction of bacteria in the system.
Use a Service Kit
An RO System Service Kit can help make replacing filters simpler and keep your system in peak performance. These kits typically include O-rings, Teflon tape, silicone lubricant, and a filter housing wrench.
Inspect for Faulty Parts
While opening the filter, check for faulty parts and replace them with new ones. This prevents recurring clogging issues.
6. Standard Filter
If your standard water filter is stuck, follow the instructions below.
If You Have a Stuck Water Filter
Turn Off the Water Supply
Turn off the feed water supply line valve to the reverse osmosis system.
Close the Tank Valve
Turn the blue ball valve on the top of the tank a quarter turn clockwise to close the ball valve on the storage tank.
Close Auxiliary Lines
If you've a line going to your ice maker or refrigerator from your RO system, turn off the ball valve on that line as well.
Release System Pressure
Open the RO faucet and allow the pressure in the system to release completely.
Place a Tray Underneath
Place a shallow tray or pan under the water filter housing to catch water spillage during the inspection.
Remove the Filter Cartridge
Remove the used filter cartridge once you've unscrewed the vertical filter housings. You may need a filter housing wrench if you've trouble removing the water filter.
Inspect the O-Rings
Carefully remove the O-rings and place them on a clean surface. Clean them with a soft cloth and inspect for nicks, cuts, or abrasions. If they appear damaged, replace them immediately.
Wash the Housings
Wash the disconnected filter housings using warm water and a dash of liquid soap. Make sure all soap is washed out before inserting the new filter and reattaching.
Lubricate and Reinstall
Lubricate the O-ring lightly with silicone lubricant. Insert it into the filter-housing groove and make sure it's accurately seated. The O-ring provides the watertight seal between the housing cap and housing.
Check for Leaks
Turn on the water supply and check the system for leaks. You should see a small steady stream or fast drip within a couple of minutes, signifying the filters are working properly.
After completing these steps, while the storage tank valves are still closed, let several gallons of water go through the RO system and out of the RO faucet. Then turn off the faucet and open the storage tank ball valve by turning the blue ball valve a quarter turn counterclockwise so that the blue handle is parallel with the tubing.
When the tank is filling you may hear the water running. It takes several hours to fill an empty tank.
Once the tank has filled, open the refrigerator or ice maker line. Your system is now ready for use.
7. RO Membrane Water Filter
For an RO membrane water filter, follow the tips below.
If You Have a Stuck Water Filter
Shut Off Water Lines
Switch off the main water line. Then switch off any water line connected to the ice maker or refrigerator. Open the system faucet to drain out water from the container. Close the faucet after the water is fully drained.
Disconnect the Membrane Housing
Open the water purifier system by disconnecting the membrane housing. Using a strap wrench to open the housing is advised. The membrane is disconnected to prevent damage during cleaning, as bleaching agents damage the RO membrane.
Drain the Housing
Drain out all the water from the housing completely before proceeding.
Use Chemical Cleaners
Chemical cleaners do a great job cleaning the RO membrane. However, the cleaning agents are advised beforehand in the instructions manual. Follow the instructions manual carefully.
Examine the Deposits
You'll find deposits on the membrane including calcium carbonate scale, metal oxide deposits, silica scale, organic and inorganic colloidal deposits, and organic material like fungi and molds.
Clean with Proper Solutions
There are a variety of generic cleaners available in the market but chemical cleaners do a much better job at cleaning and sanitizing than generic ones. Generally, three categories of cleaners are used: acid cleaner, alkaline cleaner, and sanitizer. Flushing the system after each cleaner is mandatory. Also clean the membrane housing with a bottle brush and liquid soap. Bleach and water work fine too.
Reinstall and Test
Reinstall the water filter and check the water flow and quality to make sure everything is working correctly.
8. Inline Post Filter
Generally, the standard RO system has one inline post carbon filter situated horizontally next to or above the RO membrane housing. Some inline filters come with threaded fittings on each end while others use quick-connect fittings.
If the Water Filter Is Stuck
Follow Previous Steps
Complete steps 1 through 5 from the standard filter section above, then continue below.
Disconnect the Tubing
Press down the small ring where the tubing connects to the filter. Press and hold the ring down to pull the water filter tubing out.
Replace Fittings
Remove the old filter fittings if your filter has separate fittings screwed into each end. Wrap plumber's tape 2 to 3 times on the male threaded end of every fitting. Screw the threaded fitting to the fresh filter.
Reconnect Tubing
Push the tubing into the fitting or filter on every end as far as possible. If leakage occurs after turning on the water supply, the tubing wasn't pressed in far enough.
Turn On and Check for Leaks
Turn the incoming water supply line on and check the entire system for leaks to complete the unclogging process.
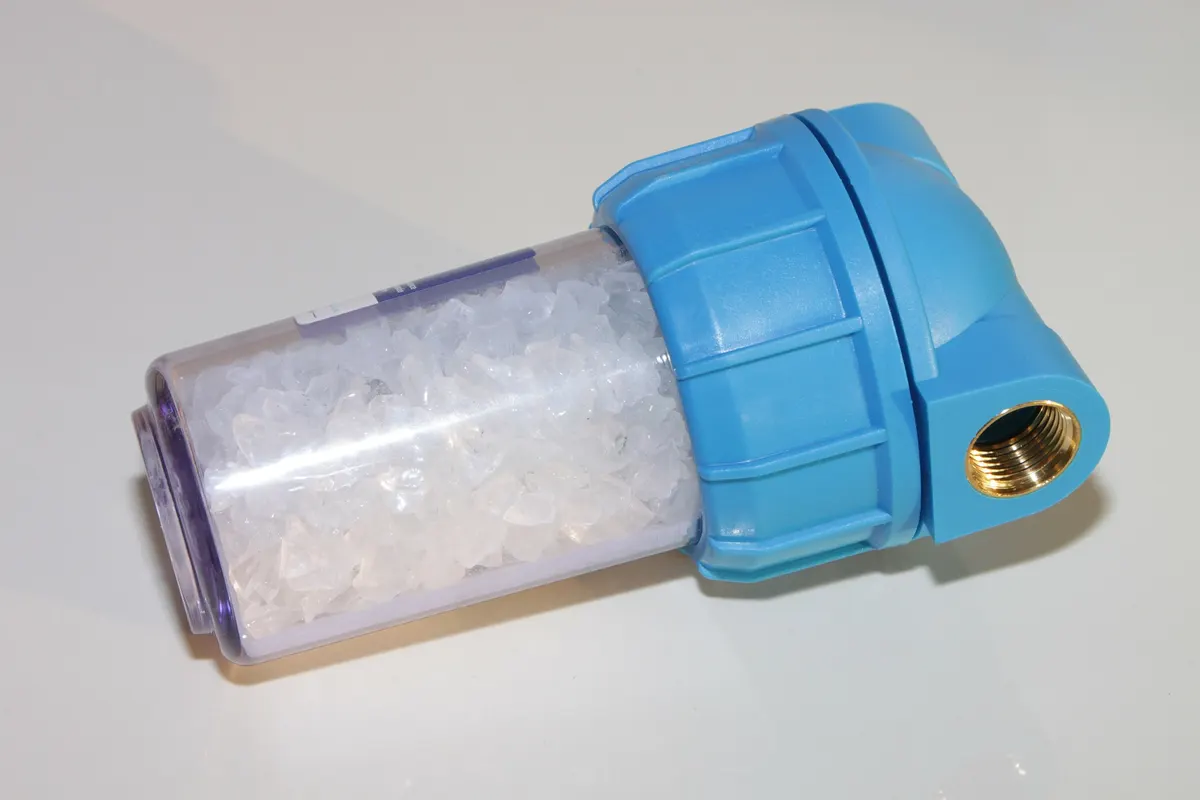
9. Granular Activated Carbon (GAC) Filter
The Granular Activated Carbon filter consists of loose carbon granules whose function is to absorb contamination. These granules result in a higher water filtration rate and are larger than carbon powder particles.
If the Water Filter Is Stuck
Turn Off Water and Release Pressure
Turn off the water supply using the shut-off valves. Locate the red pressure release button on the filter housing cap and allow any pressure inside the housing to release. This makes removing the blue filter sump much easier.
Unscrew the Blue Sump
Unscrew the blue sump with a spanner wrench from the filter cap.
Remove and Inspect the O-Ring
Locate the O-ring and remove it. Make sure the lubricant is intact. O-rings are advised to be replaced annually. Replace the O-ring if you see any cracking, kinking, or leakage between the housing cap and the sump.
Discard the Old Filter
Discard the old filter cartridge and prepare the housing for the new filter.
Clean and Disinfect
Clean the housing and filter cap with warm soapy water. Top up the filter with one-third water and mix 2 tablespoons of generic bleach. Disinfect with scrubbing while wearing rubber gloves. Rinse all parts thoroughly.
Flush the New Cartridge
A fresh filter cartridge will release fine black powder called "fines" after installation. Let running water through the system for 5 minutes initially, then flush again after an hour for another 5 minutes.
Install the New Cartridge
Remove the fresh cartridge from packaging and slide it into the housing sump. Make sure the cartridge has slid over the standpipe in the bottom. Using the spanner wrench, screw the blue sump to the housing cap tightly but don't over-tighten.
Lubricate and Replace the O-Ring
Lubricate the O-ring with generic silicone lubricant. Place the O-ring in the groove at the top of the blue sump and press it into place. Make sure it's properly aligned to the groove.
Fill Slowly and Check
Fill the water in the system slowly. Release any trapped air by pressing the pressure release button. Check for leaks and use the spanner wrench to tighten the O-ring if needed to create a good seal.
10. Ultrafiltration (UF)
If the Water Filter Is Stuck
Close the Main Water Supply
Close the main water supply line to the water filter. You don't want water spilling everywhere during this process.
Prepare the Cleaning Solution
Gather the cleaning solution and preheat it to the appropriate temperature. For seawater applications, reverse osmosis permeate is preferred.
Recycle the Cleaning Solution
Recycle the cleaning solution using low-flow pumping. Make sure the pH is adequate and adjust if needed. Add more acid if the pH increases by more than 1 unit during acid cleaning. Add more caustic if it decreases during alkaline cleaning.
Prepare Fresh Batches as Needed
Make a fresh batch of cleaning solution when the current one becomes very murky or discolored. This process can take up to an hour if only one cleaning solution is needed.
Soak the Membrane
The soaking step takes up to two hours. An overnight soak of 10 to 15 hours can be beneficial depending on the extent of fouling. Apply slow recirculation to maintain high temperature during extended soaking.
Perform Backwash with Air Scour
Regular backwash with air scour on the UF skid is advised. Air scour loosens particles deposited on the membrane surface, which is important before a CIP (clean in place) process.
Displace Feed Flow
Air is subjected from the bottom on the outside of the fibers. Displaced feed flow and concentrate subjects air from the top for disposal.
Drain the System
Apply basic shut-off procedures to remove the UF skid from service and clear out the water. The cleaning solution might get diluted by residual water, so make sure to drain everything completely.
Flush the System
After the soak period, drain the CIP tank and fill it with RO permeate or clean water to prepare for the flush step. Repeat the recirculation step for 10 minutes to flush the CIP tank and piping.
Introduce Air During Soak
To shake the fibers for amplified cleaning, introduce air for 5 minutes while in the soak phase. Do this every 30 minutes for the best results.
Return to Service
Perform regular backwash checks post-CIP of the UF skid to prepare the system, and then return it to service.
Frequently Asked Questions
Usually it's mineral deposits, rust, or sediment that's built up over time. Sometimes it's simpler than that — the filter was turned the wrong way during install, or the release button wasn't pushed in fully. If you're in a hard water area, buildup happens faster and makes things trickier.
Yes, but be careful. Needle nose pliers wrapped in a cloth work well for protecting the filter cap while you get leverage. For RO systems, a filter housing wrench is the way to go. Just don't force it — too much pressure can crack the housing or damage the connection.
Every 3-6 months is a good rule of thumb. Keep an eye out for slower water flow, any weird taste or smell, or visible sediment building up. Those are all signs your filter needs attention before it gets stuck.
Don't panic, but act fast. Turn off the water supply and unplug the appliance immediately. Carefully pick out any remaining filter pieces, clean the housing thoroughly, and put in a new compatible filter. If anything looks cracked or damaged beyond the filter itself, call a professional.
Final Thoughts
Dealing with a stuck water filter is frustrating, but it's almost always fixable with the right approach. The guide above covers every common filter type, so there's a good chance your situation is in there.
Nine times out of ten, the fix comes down to removing the filter, cleaning everything up, and putting it back in properly. The key is knowing which technique matches your specific filter type.
One thing people overlook: keep everything clean during the process. Any contamination you introduce while the filter is out can affect your water quality later.
When in doubt, check your owner's manual — it'll have model-specific tips that a general guide can't cover.
The key to removing a stuck water filter is identifying your filter type first, then following the appropriate removal method. Always turn off the water supply, handle filters carefully, and sanitize all parts before reinstalling. If in doubt, consult your owner's manual or call a professional.